The leaves are just beginning to change here in NC, and the weather is much cooler. Perfect time for camping, except that it seems every weekend is filled with commitments and events that prevent us from getting away. Dixie Belle is parked next to our garage, anticipating our next trip, ready to go.
We went to Jordan Lake for a few nights, spent 4 or 5 days at North Myrtle Beach, and we spent a week at Myrtle Beach as well, trying out a new (to us) campground. We had a great summer, and Dixie Belle held up beautifully.
While hubby and I were camping with the kids this past summer, we had the opportunity to rent bikes for the day at a campground where we stayed. We usually go to the beach campgrounds in the summer, and dragging a cart full of beach stuff around isn't much fun in the summer heat. We rented beach cruisers, and a kid trailer for one of the bikes. Our daughter rented a kids' bike, and we popped our 5 year old into the trailer along with all of our boogie boards and beach chairs, and it was GREAT!! Instead of dreading the walk to the beach (and the walk back) we LOVED riding the bikes! We spent part of one morning just riding around the campground and exploring. Great fun.
I hadn't been on a bike in a long time. I had forgotten how much fun and how FREE riding on a bike can make you feel. No wonder kids love the things....
When we came home, I searched the Craigslist ads for awhile, but the good bikes were either too far away or too much $$$. So, I bought a new "vintage-style" cruiser bike, which I LOVE. Maybe someday I'll find a real vintage Schwinn bike, but for now, this one suits me just fine. I can take the kids riding on the greenway trails around our house, and it's wonderful exercise and a great way to spend some good family time. There are 3 parks within a mile of our house if we use the trails, so we're really having fun exploring. Pack a picnic lunch, and off we go!
The bike gets a lot of stares, and older people usually comment on how they wanted "a fancy Schwinn bike" when they were younger, then tell stories about their first bike...it's a great conversation starter.
I'll try to post some photos of our adventures soon.
Thursday, October 6, 2011
Saturday, June 25, 2011
Maiden Voyage!!
Whew! It's been a long time coming, but we finally went on our first trip with the Shasta! Back in the spring, we went to the RV show and received a voucher for some free nights at a campground about 2 hours away (which might remain nameless to protect the innocent). Although I'd really wanted to take our first trip at a place about a half hour away in case something went wrong, we felt confident enough that all of her systems were good to go to give this place a shot. The photos of the pretty and serene lake were enticing. With thoughts of campfires with marshmallows and chocolate oozing out of graham crackers, we set off on our first adventure with our newly renamed Dixie Belle the Beach Motel.
![]()
I was able to get the registration done on Monday - FINALLY! I took the bond, my other documents, the bill of sale and the amendment to the bond, and the lady at the DMV gave me the plates! Yahoo!!! What a relief! The title should arrive in 3-4 weeks. Yay. From there, we put everything into fast forward so we could get ready for our trip.
We had new trailer tires put on her the week before the trip. We also had a spare mounted on a new 15" rim and hubby put it on the bumper. Then, we spent a day in the parking lot of "The Store that Shall Not Be Named" with a guy who has a portable welder that we found through Craigslist. He welded on the pieces for the anti-sway bar. The tires and the sway bar made a HUGE difference in how well she towed, especially when semi trailers would pass us on the highway.
Things went relatively smoothly for the whole trip, even though we were pummelled by falling pine cones the first night during a severe thunderstorm. I woke up thinking that I heard raindrops, but it turned out to be pieces of pine tree and debris falling from the huge white pines overhead. THEN the rain started once we got back into bed. The Shasta kept us safe and dry, although I worried about the big dents on the roof that I was sure were going to be there in the morning. My fears weren't realized, however. She's just fine.
We had another rainstorm the following evening, just as we had begun preparations for grilling some burgers. We lost power, and we also got 4-5 inches of water in our campsite. The water drained off quickly enough, but we were soaked and any thoughts of grilling dinner were kaput. We had some overcooked macaroni and cheese, played cards and watched a movie when the lights came back on.
Most of our day was filled with swimming and digging in the sand on the beach. The lake was truly wonderful. Shallow water on a white sandy beach, shade on the beach to sit under and watch the kids play. It was really nice the first two days and nights. The third night was an eye-opener, though! The place we stayed is primarily a seasonal resort type of campground. There are about 100 or so overnight spots clustered together in the center of a seasonal / year round campground. There were relatively few seasonal people around the first two weekdays that we were there. On Thursday night, the seasonal campers started pouring in; and I don't think I've ever seen so many golf carts outside of a golf course. We saw one or two golf carts zip by every minute or so. Little kids, ages 7 or 8 were driving them, music was playing and they were just crusing around. Until midnight. We also found out that the piers at the lake are lit at night, and we could have gone swimming in the evening. Kind of maddening to discover things about the campground on our last night there that the staff could have told us about - after all, weren't they trying to entice people to camp there by offerring free camping? Hmm.
We also discovered that the campsites don't have fire rings like we'd thought. We had a fire one night, using our little grill as a fire pit. Lesson to be learned? Don't just ask if they allow campfires, also ask if they have fire rings!!
We were the littlest camper there until the last day when a Boler pulled in a few sites away. It was very cute, with flowers painted all over it. I wonder how Dixie Belle would look with big flowers painted on her? Nah, maybe some flamingoes would be better, I think.
Overall, we had a very successful first outing, though! Hubby is a little worried that our a/c install isn't up to the job, but I think most of the reason for the inability to keep up with the heat has to do with two kids who open the door and leave it that way - a lot! We also had really high humidity and temps in the mid-90's.
Our setup time was greatly reduced, from the amount of time needed for the popup. I think we were pretty much set up and level with the jacks on the corners and all plugged in within a half hour after we pulled in at our site. Tucking things away and sorting out where everything was took a little time, since we really didn't know what we'd need or should bring, so we brought too much stuff. As we camp more with her, we'll figure those things out and cut our time down.
The pottie closet was a lifesaver. The hinged door made an awful creaking noise when we opened it, causing my daughter to insist that we were making the noise on purpose to wake her up! Ha - wish we'd thought of that sooner....
There is a lot of heat produced by the hot plate burners. We can use them inside, but it will be better to use them outside when it's really hot. We need to add an exterior outlet and also an outside light of some type.
Our awning worked rather well, all things considered. We put it up twice, and both times had to take it down due to rain and wind. We purchased some hooks from Ebay that go into the awning rail at 2' intervals. They stay attached to the rail and they're designed to be used with a tarp and 2 or 3 adjustable tent poles to create an awning. They work very well, although one did pull out during the winds we had. Now that we know how well they work, I'll make a nicer awning out of outdoor canvas that will work with the hooks. We'd thought about using keder welt or rope to put through the awning rail, but it really is a pain to have to thread it in when camping alone. These hooks will be much easier.
We had decided to have both of the kids sleep on the dinette bed, and this worked fine the first two nights. On the third night, the girl pushed the boy off the bed - TWICE. We should have realized this might be a problem, since her nickname was "Little Miss Kick and Flail" when she was little. The first time she pushed him off was shortly after she'd fallen asleep. We tucked him back into bed and scooted her back over on her side. Then, we were awoken at 5am by a loud bang, which was our son landing on the floor. Poor little guy. He's okay, didn't even know what had happened. Apparently, the girl took up so much room on the bed that he was edged out. We'll use a bed rail until we can get the bunk done.
We also saw a great idea for a drying rack that we'll adapt for the Shasta. A camper next to us had mounted two flagpole holders on his bumper, then attached a 3 sided rack made from pvc to them. Then he had ropes that went through the pvc pipe to hang wet towels and suits on. We'd seen this system before, but we had a popup, and there's no access to the bumper when the popup is set up. It will be much better than our little drying rack! We'll definitely use this idea at some point in the future.
Another thing we need to work on is a frame inside the closet for the plastic bins to slide in and out of. We keep our clothes in plastic bins which fit nicely inside the closet. They are clear so we can see what we have for clothes, and it's easy to give each person a bin to pack with their things before each trip. The problem is that if we need something from the bottom bin, the bins on top of it need to be taken out of the closet and put on the bed. So, a sliding rack system would make things much easier. Kind of like making drawers for the closet.
All in all, it was a great trip. We had s'mores, got sunburned, had fun swimming and walking around the campground, and we were able to enjoy some family time. Yup. Life is good.
Monday, June 13, 2011
Picture Time!!
Hubby has been bugging me to put more photos on the blog. So, here they are!! We are almost finished with the interior work at this point, just a few little fixes here and there. The outside is another story...hahha.
There are a few shots of the a/c fix that we came up with at the end. We removed a very heavy, old and most likely unsafe propane heater from the closet, leaving a gaping hole in the side of the cabinet and a round vent to the exterior. We live in NC and we camp at the beach most of the time, in the middle of summer, when the temps are in the 90's and the humidity is almost as high as the temp. So, an a/c is a MUST have item. This is the solution that we came up with. It is NOT ideal, and it works as well as it does only because the Hubster is quite mechanically inclined, and he has a good working knowledge of what he's dealing with. I wouldn't recommend doing an a/c install this way. There is still a fair amount of heat gain from the back of the unit, and we are aware that it isn't the best way to do an a/c install. BUT, it is working for now, for us, and that's all that counts.
So, with no further ado - here's the photos!!
 |
| Here's the potty closet door! I used black vinyl to label it with a "moon" like an outhouse...hahaha. I cut it where the door folds in half. No doubt what's in the closet now!! |
 |
| The gaucho, with our slightly too large futon mattress in place. We want to be comfortable sleeping at night, so we chose to use a futon mattress from a futon couch that hubby made about 10 years ago! Wow, how time flies! We'll cut it down by about 6" if it works well for sleeping. The bed size is a "double" bed, or 75 by 48" wide, the futon is 54" wide. You can also see the curtains that I'm making in this photo. Love the fabric! It's a Michael Miller quilting cotton called "Travel Trailer" and it's just lovely to work with. I hunted this stuff down and bought about 10 yards of it. I'll make some matching pillows later, I just threw the pillow forms on the bed to see what it would look like. |
 |
| The dinette bench and table are DONE!! Well, not quite done, we eventually plan to laminate the table with the boomerang aqua laminate we have in storage, but we wanted to make sure the table was the right size for us first. Nice, huh? The cushions are covered with a vintage-ey green slubby fabric that I found on sale at Joann's. I just made simple boxed cushion covers over the 4" thick foam, then covered them with batting. They're quite comfortable for sitting, not sure about sleeping yet! |
 |
| The whole dinette!! This area is where the kids will sleep. The dinette table makes into a bed that is just a bit larger than a twin size. Eventually, we'll add a pole cot above the dinette for our son to sleep on. For the next few camping trips, we'll just have them bunk together. Might make them appreciate each other a bit more....or it might be the source of great contention between them. Not sure which yet. |
 |
| The view from the door of the dinette. Lots of seating room, big table, plenty of storage beneath the benches. You can also see the electric fridge from this view. |
 |
| Fridge and microwave!! We chose not to install a regular stovetop and oven. We don't "cook" much when we camp, an oven wouldn't have been used very often, so it would have taken up valuble space. We chose to make a shelf for a pair of hot plates that can be used inside or outside. The fridge is a compact unit that can be removed if it should die at some point down the road. Same with the microwave. We usually make popcorn, heat up canned food and quick meals in the microwave, so it made sense to make a space for one. We'll keep condiments, meat and veggies in the little fridge. We keep drinks and beer in a cooler with ice outside. |
 |
| A good view of the kitchenette. The countertop is just painted 5/8 plywood for now. The sink is a bar sink that is temporary, and we don't yet have the backsplash installed. We have laminate for the permanent countertop and we'll put the original sink back in. There's LOTS of counter space. LOVE IT. |
 |
| Beneath the sink! The sink sits over the wheel well, so there's a little bump-up shelf in the front. The paper towel rack will be mounted once I figure out where to put it. I LOVE the towel bar inside the cabinet door. You just don't find great stuff like this on the new campers. |
 |
| Sliding doors beneath the entire kitchenette. This one is shallow due to the wheel well behind it. You can also see the outlet strip that hubby put just inside this shelf, underneath the countertop edge. There are two outlets here, so that we can plug in the coffee pot or hot plates without having cords dangling all over. There is also a strip of 3 outlets just beneath the upper right hand cabinet for fans or a radio, etc. The bathroom has an outlet added as well, we've plugged in a small night light for lighting needs in there. Hubby also put another outlet in the closet for the a/c and fan unit that are in there. Other than that, we have just what the camper came with - 3 outlets, one on each lighting fixture. Hubby upgraded the electrical service with a 30 amp inlet (marine style, furrion brand) to make sure we'll have enough oomph for a microwave and a/c. |
 |
| Fridge, with storage for pots and pans beneath. |
 |
| Pots and pans storage. I am so thrilled with the amount of storage this little beauty has. |
 |
| You can see the back area of the kitchenette a little bit here. The fridge is shallow, leaving about 8" of space behind it. Hubby installed an on-demand propane hot water heater behind it. The controls for it are accessible from the exterior door that was for the old propane fridge that this camper had originally. Hubby build a new vent and ductwork for the heat to vent to the outside beneath the countertop. **This is not a recommended use of this propane outdoor hot water heater. The model is an Eccotemp L5. We need hot water only for washing dishes, faces, and occasionally washing hair or bodies at the small sink. This unit produces a serious amount of heat and it's not approved for interior applications. Since we won't be using it very often and it's also got a huge access door vent right in front of it, we feel quite safe with this installation. We'll monitor it over time to see how it fares. |
 |
| Sliding access panel doors beneath the gaucho. |
 |
| A/C installation in the closet. This photo is turned sideways, sorry about that. Originally, this closet had a cavity for the propane furnace. We removed the heater and decided to install a 5000 btu window a/c unit in this space. There is a boxed vent beneath the a/c unit, and an air intake vent in the side of the camper from the old propane furnace. A 6" industrial fan blows the hot air out of the duct at the bottom of the camper just in front of the wheel well. |
 |
| Top of the unit. A piece of plywood sits above the supports in the cabinet to partition the a/c from the closet. |
 |
| Add caption |
 |
| There is a small cabinet door that will go back on here to cover up the duct (on the right) at allow access to the switch once it's mounted in place. A blast gate will go at the bottom of the duct. We'll open the gate, turn on the switch, and the power will go to the small fan and the a/c. |
 |
| This is the space we had to work with. So, an a/c unit sticking out of the side of the cabinet is far better than a big empty hole. ha! This is only a temporary mock-up to test it out. The whole thing will be finished out nicely when Hubby is done. The wiring will be run properly, and this side will have a panel over it. The area beneath the a/c will be storage for a small tool roll, and access to the switch and blast gate. |
 |
| Our happy little camper!!! |
Arrrrghhh....the TITLE saga continues......
Well, now. Thought everything was all clear for the title. EVIDENTLY not. I went to the DMV on Thursday of last week and I should have known something was wrong. There was no line!! So, I walked right up to the counter and gave the lady my documents, told her I needed to title a camper, I had a bond, and the license and theft inspector had already signed off on it.
So, she looked at my documents, asked me for my license, and I thought we were all set. NOPE. The bond and my license have to state the same name. EXACTLY the same. My license has my full name, and the bond had my middle name abbreviated as an initial. Oh, and to top it off, the bond also misspelled my last name, putting an "i" instead of an "l" in it. ARRRRGGGHHHHHHHHHHHHHHH.
I was almost in tears. I think the DMV lady took pity on me, because she gave me a card for someone who does indemnity bonds locally. I called them and found out that they do a LOT of them. And they do them on the spot, no waiting for weeks to get them. Ugh.
I called the person who underwrote my bond, told him the problem, and he asked me to send him the corrected information via email. Now to wait for the corrected bond to arrive. What a PITA.
Thursday, June 2, 2011
Title? Seriously?
Today was the day that someone from the DMV came to inspect the ol' girl and check her VIN. If you didn't join us in the beginning of this tale, let me bring ya up to speed.
We bought this old Shasta without a title from a couple that lives in NC, about an hour away from us. It had been infested with mice, some haphazard repairs had been made, but even those were failing. Wse rescued her and walked away with a Bill of Sale, the trailer, and then set about to get a title on her.
The first step in the process was to determine how much she was worth to the DMV so we could get a bond for 1.5 times the value. Letter received from the nice guy at the DMV, phone call made to find someone to tell us how to get a bond. Called our insurance agent, who referred us to another agent. Several phone calls later (and another week) and the bond was applied for. The bond was received almost a month later, but was wrong, and had to be reissued. Wait another two weeks. Called the DMV to have an inspector come see the trailer. Wait another 3 weeks, called again. Storms in the NC area had put a heavy demand on the inspectors to track down the owners of the vehicles that the tornadoes tossed about. An appointment was made for TODAY for an inspector to come and see the FrankenBeast.
So, here we are!! The inspector looked her over, made sure the VIN matched the bill of sale which matched the bond. He asked how I knew it was a 1964. I told him about the sink and the furnace dates. He asked to see the sink. (glad Hubby had cleaned it!) I dragged it out of it's hiding spot in the garage, and showed it to him. He explained that the reason why the sink has a date on it is that there is a FEDERAL requirement that the manufacturer put a date inside the vehicle. On newer vehicles, it's usually a sticker. On Shasta's, it's on the SINK. Interesting tidbit.
He then went to his car and typed in the VIN on his computer. He typed in all of my info, printed two copies and told me to bring the form, the bond, the bill of sale and my driver's license to the DMV down the street. I can request a new title and I should have it in my hands in as little as 3 weeks. YAYYYY!!!!!!!!!!
Now, because I'm such a slacker, I figured I'd post some new photos so you can see the progress we're making on Frankie. She's such a looker...at least inside. The outside is still as ugly as a bucket of toads, but beauty is only skin deep, right?
 |
| Here's the new kitchenette! Hubby reused the cutting board, drawers and the door under the sink. Everything else is new. He used fir for theh face frame, and a combination of 5/8 plywood, pine dimensional lumber for the inside frame and some birch paneling for the inside of the cabinets. The large opening on the right is for the minifridge, the opening in the center is for a microwave, and the opening above that is for storing the hotplates. He also added sliding doors along the entire length at the bottom. This will be storage for small electric appliances, pots, pans, bowls, pitchers, etc. sooooooo much storage!! |
 |
| Another view. You ca n see the vents behind where the fridge will go. The fridge will sit about 8" away from the rear wall to allow for the water heater. |


Tuesday, May 31, 2011
Lots Happening here!
Wow! I can't believe it's been a month and a half since my last post! Been busy with the camper, the other camper, kids and life. "So, how's the Shasta coming along?" you ask. Well, GREAT! So far, so good!
Hubby has mostly finished the kitchenette. Still need to put in the countertop once it's been painted and then we need to put in the sink. We decided due to time constraints to put in a temporary countertop for now. We'll use a stainless steel bar sink for the time being, so that we can take our time making the trim for the original sink. We'll do the laminate countertop later, and also the tables. Probably over the winter, when hubby's workshop is lacking for work. haha. Somewhere between Christmas and March, I think.
I am THRILLED to finally have pulled out our old popup to get it ready to sell. It's been sitting behind the Shasta, neglected and forlorn. We opened her up yesterday to check everything over, and she's going on Craigslist tomorrow. Hopefully we can find a new family to love her soon.
It's very strange to be inside the popup now that we've spent so much time on the Shasta. Even though the Shasta is technically smaller than the popup, the Shasta seems MUCH bigger. The Shasta is narrower than the popup by almost a foot. The ceiling height is also a few inches lower than the popup. The Shasta doesn't have two expanded ends, either. I think maybe the reason it FEELS bigger is because the walls are a solid material and there is so much floor space at the moment. My sweet Hubby reminded me that the Shasta is going to get "really small" once the dinette and gaucho are made into beds and there are 4 people inside. Hee hee. I'm sure he's right!!
I am also very pleased at how much storage space our Shasta has. I emptied everything from the popup and put it into the Shasta, and I still have plenty of room for more blankets, our clothes, the kids' water toys and lots of other things we might want to bring along. I put the utensils away in a drawer, the dish towels in another, wraps and bags in another, then used the last drawer for a "junk drawer" with odd bits of things we need - like clothespins, flashlights, bug spray and bandaids.
I still have a WHOLE cupboard for our bath items and another for our FOOD!!! And a bookshelf!! And there's only 2 pillows in one of the dinette benches. Ooh LA LA!! What LUXURY!!
Seriously, when taking a trip in the popup, it's like a finely tuned dance. First, we open the camper and load the sand toys, linens, lawn chairs and boogie boards. Then, we close it up and load everything else in the van. Our clothes, a basket of food, the cooler, extra shoes, the kids. Pool noodles, whatever else we might remember at the last minute goes into the van willy nilly. We get to our campsite, and then we have to level the camper, move the van, open the camper, unload the previously mentioned toys, lawn chairs and boogie boards, flip up the sink, hook up the wire shelving on the bunk ends and over the kitchen, make up the dinette, take the stovetop outside and attach it to the side of the camper, then unload the van into the camper and put everything away where it belongs. Are you tired yet? That's the reason why we haven't done many trips that are less than a week. The setup and tear down times are ridiculous!! It can take us up to 2 hours on each end of the trip, let alone driving and keeping 2 cranky kids out of trouble.
That was the impetus in looking for a travel trailer for our family. That, and the fact that we think old stuff is just nifty. Yeah, now that we're over the hump of getting this trailer ready to go, I think we can call it "nifty" and get excited again.
Photos to come.....
Friday, April 15, 2011
Spring Has Sprung
Another beautiful day in paradise - and we've been busy working on the Shasta! We've done a lot of little things, mostly. Here's an update:
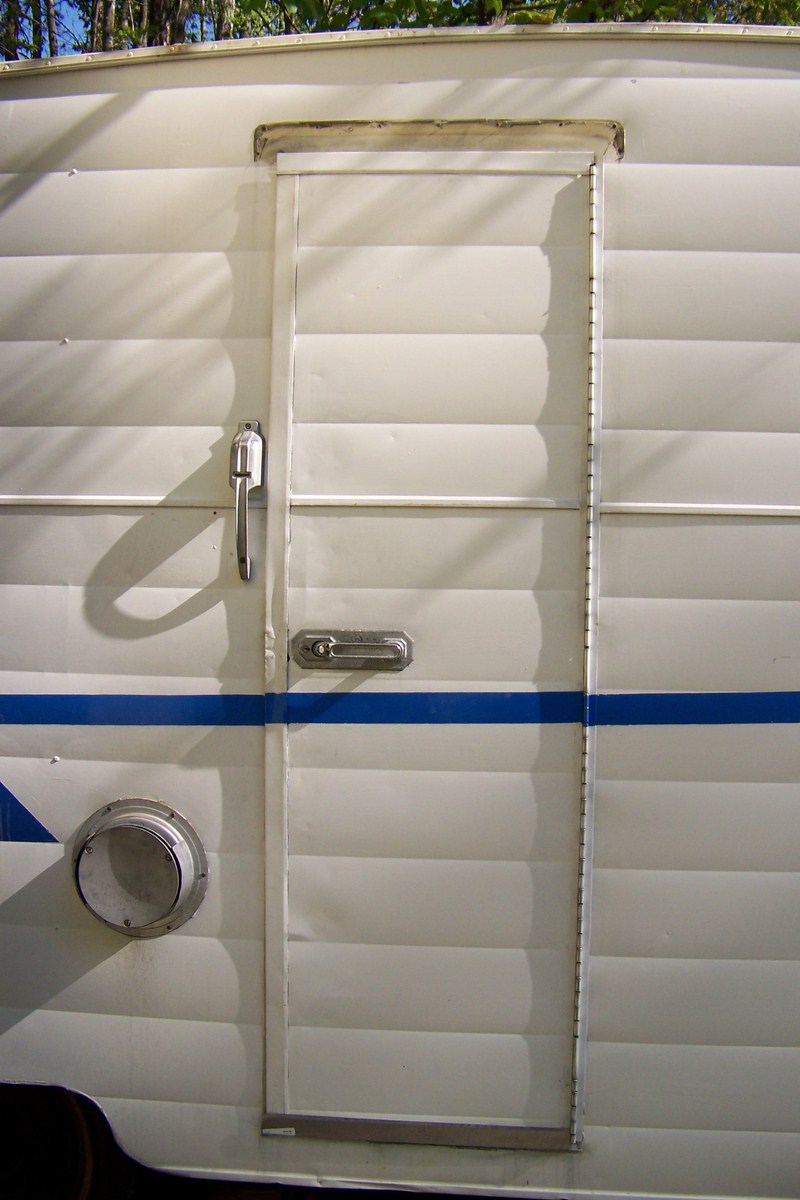 |
| The door is back! It was removed to do the flooring, so that the bottom sill would sit over the replaced plywood, subfloor and new flooring. Hubby had to cut down the side jamb pieces, by about 3/8 inch. |
 |
| While the door was off, we realized that the entire bottom piece was MISSING. There was no exterior drip edge, which fits onto the bottom of the door. So, handy hubby to the rescue once again! He made the kick plate at the bottom, then bent it to fit the bottom edge of the door, and made a drip edge on the exterior. Still needs paint on the outside, but it looks good!! It will keep the water from dripping off the bottom of the door and destroying the floor again. |
 |
| Ta da!! New floor!! We removed 2 layers of vinyl tiles that had been put over the asbestos-laden 9x9 original tiles (we used a heat gun and lots of TIME to slowly lift the vinyl tiles without disturbing the original layer). Then, we put down a lauan subfloor to cover the asbestos and any cracks. The new tiles were laid over this subfloor. I am not sure if I'm happy with my choice or not, as some of the tiles aren't adhering as well as they should. However, they're inexpensive tiles, were easy to cut and install, and they really brighten everything up. They're fine for now, but I think we may take these up and put down VCT after all - after we've had some rest!! |
 |
| A view of the front! The seat boxes have turned out beautifully! Each seat has a lid that lifts up to access the storage below. We'll keep bedding in the bench boxes - one side for the kids, and one side for us. There will be a decorative end cap put on the bench by the door. The other bench will be closed off by the kitchen cabinet that will sit next to it for the refrigerator. I'm waiting on the foam to arrive so I can make the cushions now!! |
 |
| A shot of the interior at the rear. New panel from the window down to the floor, and a new potty closet. Hubby rebuilt the small night table/book shelf, and the box for the long pole tunnel. Both of these pieces will have a laminate top added once the kitchen is completed. We removed the piece of 1/8" birch paneling from the gaucho base so we would have some of the original birch to patch pieces of the paneling. The gaucho will have a new piece of lauan cut to fit. |
 |
| The FABULOUS new POTTY CLOSET!!!!! Seriously, this is the reason we bought this camper, ok? Hubby expanded the closet by about 5" toward the front of the camper, using some of the space that had been the countertop. This made the closet just big enough for all of us to be able to use it if needed. He made a platform for the portapot to sit on, making it a more comfortable height, and also hinged it so we can store extra TP underneath. The long pole storage tunnel links up to this platform, so the pole storage runs the entire length of the back of the trailer. We may not need the entire length for our awning poles, but we have if it we need it for the bunk poles. |
 |
| You can sort of see the inside of the closet wall in this photo. The frame was stripped, then reshellacked and screwed back in about 5" forward of where it was previously. The inside of the closet was also shellacked and then a new panel was placed at the very top, to cover up the damage from the vent pipe. Hubby used a piece of 1/8" birch cut from a panel taken from the gaucho platform and adhered it to the inside of the potty closet "ceiling." |
Other things have been completed as well, including removing the old vent stack from the roof, and resealing the hole. Still needs a bit of paint, but it looks great and is water tight now. There are also small holes in the skin around the windows that need to be filled with aluminum filler (bondo), and repainted. For now, we'll do a patch-up paint job with a rattle can. Eventually, the house paint will need to be stripped, and we'll repaint the whole trailer, removing and cleaning the rest of the windows in the process.
The back end is being battened up once again as well. Lots of problems on that one, though. After removing the skin, the boards spanning the width were also removed, and the back end spread apart slightly while they were off - about a half inch. That was just enough to throw the whole thing off when trying to get the skin back on. Lots of cussing and pushing, and I think we may have it back on in a day or two of good weather. The edges have been shaved down a bit, and we'll make it work, then reinstall the rear window, which is still being repaired. It will look a bit odd until we have new paint over it.
Aside from that, all that we really need to finish before we can take her camping is the kitchenette, the table, the cushions, curtains and put on new rubber. Still need to cut the dinette windows, too. There are a bazillion little odds and ends, such as painting the lights (the gold/brass color of the fixtures is coming off in places and just plain filthy), repaint the door handles, paint the tongue and bumper, strip the wings, remove the rock guard and find something more appropriate, oh - and update the electrical! We have the parts and pieces, once hubby finishes the cabinetry for the kitchenette, he'll update the service to 30amp and install a separate circuit for running small appliances in the kitchenette.
I received the Indemnity Bond - FINALLY. I figured going through a local agent would be more expedient and less likely to have a problem, but I was wrong. The first bond that was issued didn't even have the vehicle listed! It took almost a month to get a bond locally that an online service would have completed and sent to me overnight. Lesson learned! I also discovered that I could take the trailer TO the DMV to have it inspected by an agent to ensure the VIN matched for the title documentation. Once the back end is buttoned up, we'll take it to the DMV and get that done.
But, we're getting there! That's half the fun, right??
Tuesday, March 29, 2011
What have you done for me lately?
Remember that song from the 80's? Anyway, here we are, another beautiful week in NC, and the weather is messing with us once again. Hubby took this week off, what with all the sunshine and heat we'd been having, he figured he'd have perfect working conditions to finish the inside of the Shasta. Hmm. Maybe not! We've had a lot of wet weather, which we can sure use, but the freezing temps that came with it have been a hindrance. One thing I love about that man - he doesn't complain about it, he just puts on another layer and gets on with it. (me? I'm inside typing this up while the heater in the camper toasts it up a bit!)
The good news is WE HAVE BENCHES!!! Yayyyy!!! And the potty closet is almost finished!!! The back interior panel has been replaced, and the hubster built a new nightstand/bookshelf and cover for the storage tunnel!!! Yayyyy!!!!
The plan for today is to dry-fit the benches, then put down the lauan subfloor, and put down the new tiles. I had gone around and around about which tiles to use - inexpensive vinyl or use VCT. I love the look and feel of the VCT tiles, and they aren't difficult to install, really. The deciding factor was the weight, though. We tow with a 6 cylinder, max towing capacity of 3500 lbs (a lot less once we factor in the kids and our gear). We want to keep the weight down in this trailer, so that we are well within those maximums. The difference in weight between VCT and vinyl was somewhere between 35 and 50 lbs. So, we chose the vinyl. It will also be easier to replace just one square if it becomes damaged.
Well, it should be warmed up enough outside to get back to work. I'll be dreaming of beaches and margaritas tonight, that's for sure!!
The good news is WE HAVE BENCHES!!! Yayyyy!!! And the potty closet is almost finished!!! The back interior panel has been replaced, and the hubster built a new nightstand/bookshelf and cover for the storage tunnel!!! Yayyyy!!!!
 |
| Potty closet and rebuilt bookshelf/nightstand. The "box" to the left of the nightstand is a support for the gaucho which is hollow inside. There is a full-width storage compartment that runs the width of the camper that is accessible from the storage door on the side of the trailer. This was the storage for the awning poles or bunk poles. We still haven't replaced the exterior skin yet - the weather is too unpredictable to untarp for any length of time. |
 |
| Benches for the front dinette. There will be lids that lift up to access the gobs of storage space these have. We don't plan to replace the water tank that would have been under the right side bench, we'll keep the kids' bedding on the right side and our bedding on the left side. Each bench is 24" deep, 14" high and 41" wide. This was a test-fit, the bench on the left will be made like the one on the right side. |
 |
| A better view of the bench frame construction. The lift-up lid will cover the open portion and be made of 5/8" plywood. I think! |
The plan for today is to dry-fit the benches, then put down the lauan subfloor, and put down the new tiles. I had gone around and around about which tiles to use - inexpensive vinyl or use VCT. I love the look and feel of the VCT tiles, and they aren't difficult to install, really. The deciding factor was the weight, though. We tow with a 6 cylinder, max towing capacity of 3500 lbs (a lot less once we factor in the kids and our gear). We want to keep the weight down in this trailer, so that we are well within those maximums. The difference in weight between VCT and vinyl was somewhere between 35 and 50 lbs. So, we chose the vinyl. It will also be easier to replace just one square if it becomes damaged.
Well, it should be warmed up enough outside to get back to work. I'll be dreaming of beaches and margaritas tonight, that's for sure!!
Thursday, March 24, 2011
Big RV's versus Vintage Shasta
It's springtime here in NC, and there's a huge RV show at the fairgrounds that hubby and I go to every year. In the past, we've always oooh'ed and ahhhh'ed at the big rigs and the cool features of the new RV's. We get a lot of good info about campgrounds in the area, things to do and places to try. We usually have to stand in line to look at some of the fancy Class A's in the $500K range. We dream about buying a big new RV for our family and think about the features we'd want if we bought one. It's a lot of fun.
Every year before this one, we've had the popup camper to compare the features to. We see how much more room is in one of those big RV's and how much easier it would be to set one up compared to the popup. But, we have a vintage Shasta this year. Since we are renovating it, we were looking at the new RV's for features that we could incorporate into our camper. We looked and looked for ideas. We saw 32' RV's with 3 flat screen TV's, and an outside cooking area with another flatscreen. We were amazed at the storage capacity of some of these behemoths. We thought the kids would really like the RV that had a separate "kid's area" with sleeping bunks, a couch and a place to put a TV and gaming system. We drooled a little bit, then came back to reality.
What would camping in one of those big rigs really look like for our family? How would camping in one of those big luxurious campers enhance our enjoyment? Would it improve our experience or detract from it? What would the differences be between camping in our Shasta, and camping in a 32' RV with 4 TV sets?
My husband and I came to the conclusion that it would be much more convenient to have a place that the kids could hang out sometimes. It would be nice to have a big bedroom area where we could watch TV and sleep in peace without kids tramping on us to get to the potty. It would be great to have a camper with a big cooking kitchen and sink right outside, so we could sit around and socialize while preparing dinner.
But - that's just not for us. We spend our family vacations at campgrounds so that we can spend time together AS A FAMILY. We do get on each other's nerves when we have to be cooped up in the camper due to rain. But, we figure it out. We pull out games or a movie on the 7" video player, make popcorn and sit at the dinette. We get up in the morning, start a pot of coffee, walk to the bath house wearing our PJ's and holding the kids' hands. That's what we do. That's how we are. And no fancy RV is going to change that.
Yeah, I guess the big rigs will just have to sit this one out. We'll be the ones with the vintage Shasta, parked next to that $500,000 RV. Feel free to knock on the door and say "hello" - we'll have a cup of coffee waiting for you.
Tuesday, March 22, 2011
The Wings of Shasta...
(Edited 3/30/2011: The wings have a new home! They'll be on their way tomorrow!)

I'd been looking for a small camper for most of the previous year, and I figured it was serendipitous that popup would die just as I found a 1971 Starflyte which had been gutted. I proposed that we use the parts from the popup to rebuild the Starflyte to our needs. So, we bought the Starflyte. We bought parts for it, including a used pair of wings (she had no wings when we got her) and a used Bargman 66 door handle.
As Fate would have it, the damage to our popup wasn't as bad as we thought. My husband was able to spend the better part of a weekend doing the roof over, and I was able to clean and remove the giant mushroom and mildew. We camped in her several times last season, and had a lot of fun.
Meanwhile, the 71 Shasta sat in our yard, unused and lonely. We realized that we'd jumped the gun in buying her, and she wasn't the vintage "canned ham" type that I had really wanted in the first place. She just wasn't going to work for our family, and she wasn't the "one" for us.
So, we sold her to someone who is going to turn her into a rolling boutique. Great idea, and she'll get a new lease on life.
Now we're left with a box of parts that we'd intended to use to remodel that Shasta. Some of the parts we will be able to use on Frankie. But, not the wings. So, here they are. I'm aking $200 pluys your choice of shipping, Paypal or a money order with a 10% Paypal deposit. Make me an offer I can't refuse so they don't end up on Ebay. (PS - a pair sold recently on Ebay in the $180 range, these are in really good shape. I'm certainly willing to listen to offers, though.)

Friday, March 11, 2011
Beauty is not skin deep...
We will be working more this weekend, trying to close up the gaping back end of Frankie. The weather is cold today, so hubby is driving cross-country (seems like) to get some birch paneling so we can closer her back up.
We live in a pretty large city (Raleigh) and one would think there would be lots of hardwood distributors around here that carry 1/8" birch. Well, after many phone calls, we found a place on the other side of the city that carries "bendable birch 1/8" plywood. So, hubby took the van on a mission to get some. He came home and we looked at what they loaded into the van. It's bendable, all right! A little too bendable. The original birch was 1/8" and had 3 layers - two birch exterior good faces with an inner layer of inferior grade wood. The "bendable" birch that we picked up had just one face layer and a back layer of inferior wood. Two ply, not three, and barely 1/8 inch thick. It just won't work as paneling. So, he's returning it to the store. While he's gone, I'll bring this blog up to where we're at in this process.
Last week, hubby removed a gazillion rusted, painted over screws so we could remove the dinette windows and also open up the back end. The interior paneling was shot, a PO had used multiple layers of polyurethane to cover up the damage. We decided to completely redo the back end before we take her camping this season. It looked severely damaged and we were afraid of the rot we'd find behind the skin, with good reason!!
So, we began the task of removing the back skin, taking off the lights first, which had gobs of silicone caulk on them, removing drip rails on both edges, and the rear window. The offending screw was just the tip of the iceberg, evidently. Eeek. They say a picture is worth a thousand words, so here's my novel:
We were aware that she would need a few months of work and quite a bit of cash to fix her. We bought her anyway. We'll make her strong and sturdy, and she'll bring many years of enjoyment for our family. She may never be a showpiece, but she'll be a lot of fun!!
We live in a pretty large city (Raleigh) and one would think there would be lots of hardwood distributors around here that carry 1/8" birch. Well, after many phone calls, we found a place on the other side of the city that carries "bendable birch 1/8" plywood. So, hubby took the van on a mission to get some. He came home and we looked at what they loaded into the van. It's bendable, all right! A little too bendable. The original birch was 1/8" and had 3 layers - two birch exterior good faces with an inner layer of inferior grade wood. The "bendable" birch that we picked up had just one face layer and a back layer of inferior wood. Two ply, not three, and barely 1/8 inch thick. It just won't work as paneling. So, he's returning it to the store. While he's gone, I'll bring this blog up to where we're at in this process.
Last week, hubby removed a gazillion rusted, painted over screws so we could remove the dinette windows and also open up the back end. The interior paneling was shot, a PO had used multiple layers of polyurethane to cover up the damage. We decided to completely redo the back end before we take her camping this season. It looked severely damaged and we were afraid of the rot we'd find behind the skin, with good reason!!
So, we began the task of removing the back skin, taking off the lights first, which had gobs of silicone caulk on them, removing drip rails on both edges, and the rear window. The offending screw was just the tip of the iceberg, evidently. Eeek. They say a picture is worth a thousand words, so here's my novel:
 |
| Eyebrow removed over the rear window, rear Hehr window removed. The original caulk is still in place under the eyebrow. It's different from the putty tape we'd expected. It's more like plumber's putty, and it's still soft. |
 |
| Our first glance at the damage under the skin. |
 |
| Here's the back lower skin removed, we tried everything to get this thing loose, turns out it just lifts off. We see some damage, but it's not as bad as we feared....yet. |
 |
| This is where the Shasta assemblers nailed through the exterior into the potty closet frame. |
 |
| Streetside back end. |
 |
| Curbside back end. Lotsa rot. |
 |
| We found this symbol stamped all over the back of the paneling - Made In Canada. Eh? |
 |
| Peeled away the insulation and you can see the problem right away. |
 | |||||||
| Left side. Lots of problems here, too. Don't worry, we'll fix it!
|


Just a heads-up for anyone who is reading this blog and thinks that you would "see" damage right away and know if a trailer is in good shape before you buy it, or that you can take a seller's word for the condition of a trailer. This trailer looked pretty good in photos. The owners had done some cosmetic fixes, and we were enticed enough to drive an hour to look at it. When we arrived, we did a more thorough inspection, and we were aware of what damage probably lay behind the walls. We knew that the wrinkled paneling meant that water had gotten into the walls, and probably damaged the framing. The owner told us she was "solid." I'm sure that the owner didn't mean to mislead us, he was probably just not aware that these things will hold together and defy gravity regardless of the condition of the framing. She certainly is a gravity - defying piece of work, isn't she??
We were aware that she would need a few months of work and quite a bit of cash to fix her. We bought her anyway. We'll make her strong and sturdy, and she'll bring many years of enjoyment for our family. She may never be a showpiece, but she'll be a lot of fun!!
Wednesday, March 9, 2011
Frankie's Butt Lift Begins
One of the major concerns that we had about the Shasta is that her back end shows a lot of water damage. We discovered how bad the interior was after we brought her home and poked at her with a screwdriver. The screwdriver went through the paneling into nothingness. Eeek. Can't be a good sign, right?
So, part of this renovation will be devoted to fixing her back end properly. We planned to remove the aluminum skin from the window down to the skirt and replace the interior paneling and the framing.
We removed the rear window, then hubby got to work removing all the screws from the eyebrow and the lower edge of the rear panel. When we started this project, hubby bought a few new tools (gotta have new tools for a new project, right?) He got a multi tool. It's pretty cool and now I want one, too! The screws on the exterior had rusted, using a screwdriver was impossible. He used the multitool to cut a new straight slot in the phillips screws, then he was able to just unscrew them. Smart guy....you'd never know he takes stuff apart for a living, right?
On the interior, the nightstand and the boxed-in area for long pole storage was removed. I'm not sure if all of the 62-64 SC's had this box or not, but I haven't seen it on earlier SC's. We discussed not replacing it when we're finished, but came to the conclusion that it would really be handy to have a 7' long storage area for bunk poles or other long items. We'll replace it when we're done. It's accessible through the side storage door that opens beneath the gaucho. It ran across the entire back end and terminated behind the black water tank. We removed the tank, but hubby will build a box in the potty closet to sit the portapottie on, so it will run the back length again.
So, part of this renovation will be devoted to fixing her back end properly. We planned to remove the aluminum skin from the window down to the skirt and replace the interior paneling and the framing.
One of the things that made me very angry about this camper is that a PO covered the windows with plastic and used roofing nails to secure it. They drove the nails through the interior birch, the window trim, and the nails poked through the trailer in lots of places around the windows. This caused not only immediate damage, but also allowed water to penetrate and destroy the paneling and the interior of the trailer. Ugh. Here's a good shot of the nail poking through the back skin by the window.
 |
| left side of the rear window. Nice nailhead poking through, covered by paint. |
On the interior, the nightstand and the boxed-in area for long pole storage was removed. I'm not sure if all of the 62-64 SC's had this box or not, but I haven't seen it on earlier SC's. We discussed not replacing it when we're finished, but came to the conclusion that it would really be handy to have a 7' long storage area for bunk poles or other long items. We'll replace it when we're done. It's accessible through the side storage door that opens beneath the gaucho. It ran across the entire back end and terminated behind the black water tank. We removed the tank, but hubby will build a box in the potty closet to sit the portapottie on, so it will run the back length again.
The Brilliant Idea
If you have a Shasta, or possibly any other vintage trailer with birch paneling, then you know the little spiral shank paneling nails that are all over the interior, right? If you've ever had occasion to remove one (or more) of them, then you know what a pain they are to get out, right?
Well, imagine having to remove about 80 of them to take off a panel that delaminated. Ugh. After an hour and a half of picking them out with little wire cutters that reminded me of cuticle nippers, a pair of channelock pliers and a small pry bar, we had only removed about 2 dozen. The PO's had sunk the heads below the surface of the wood. Eek. Dig dig dig dig, scrape, gouge, bruised hands, dig dig dig.
Well, imagine having to remove about 80 of them to take off a panel that delaminated. Ugh. After an hour and a half of picking them out with little wire cutters that reminded me of cuticle nippers, a pair of channelock pliers and a small pry bar, we had only removed about 2 dozen. The PO's had sunk the heads below the surface of the wood. Eek. Dig dig dig dig, scrape, gouge, bruised hands, dig dig dig.
Suddenly, my husband disappeared into the garage, and returned with a drill. I thought he'd finally given up and decided to just drill the heads off. Nope. He put a drill bit into the drill chuck BACKWARDS, and then put a #12 countersink bit on the end of it. So, the contraption looked like this.
 |
| A little blurry, but here's the drill bit and the #12 countersink on the drill. He moved the countersink to the end of the drill bit shank, then pushed it out a little more. The nailhead fits inside the blades on the countersink, and the nail head hits the end of the bit when the countersink has dug out enough wood. Kind of an automatic depth stop. |
 |
| This is what the contraption does. Now, just use a pair of dikes or a needle nose plier to pull the nail out. |
 |
| Nailheads ready to be pulled. |
We finished the rest of these in a half hour. We needed to keep the panel intact to use as a pattern for a new one. The PO's had removed a layer of the birch and then used polyurethane on the glue base. It was rough and not very sturdy anymore. The side with the door was coming apart in layers as well. After pulling all of those nails out, we discovered that the paneling was glued very securely to the frame of the closet. ugh. More pounding and scraping.... Hubby smoothed the frame down with a wood plane, removing bits of wood and glue still stuck to it. Our goal was to save the frame so we (actually my husband, the Woodworker) could rebuild the closet without having to remake the curved frame to fit the roofline.
This closet is for the potty. Hubby is replacing the panels on both sides of the potty room, and he'd already removed the kitchen to rebuild the cabinets. So, I asked him, just out of curiosity mind you, how hard would it be to make the potty room just a teensy bit bigger? He got out the tape measure and we checked where the drawers will fit if the closet wall is moved forward. We figured out that we have at least 6" to spare of kitchen length, after accounting for the current 36" of cabinetry and the new cabinets that will be built for the microwave and refrigerator. Everything should fit perfectly. It's not going to add much time to the project, since we'd planned to replace the panels already. He'll need to cut two extra framing pieces to move the wall forward toward the wheelwell about 5 or 6 inches. Believe me, that will make a huge difference in how functional that potty room will be. It will be nice to be able to turn around and lift the lid without having the door open!!
Yay!!! I'm thrilled!! I keep telling him it doesn't take much to make me happy. hahaha.
Subscribe to:
Posts (Atom)